短信验证码
当今网站,为了防止,机器人非法注册,出现了,图片验证码, 短信验证码,。。。
今天就来讲一下,短信验证码的流程
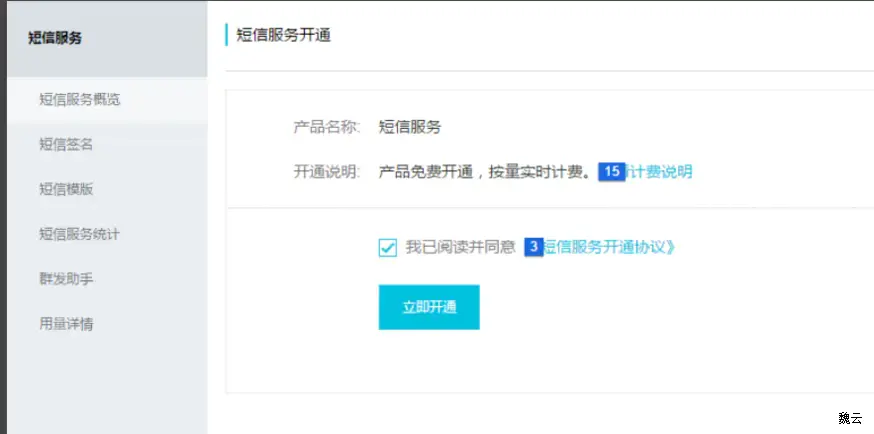
这里以 阿里云为例,很多网站,都提供短信服务,API, 只需要SDK, 就可使用,开通服务即可,
短信验证码
一, 注册并实名制
1.1 创建一个阿里云账号,点击这里
1.2 实名认证:点击这里
1.3 绑定企业支付宝:点击绑定企业支付宝
二,开通短信服务

2.1 子账户(使用) 点击看子账号页面

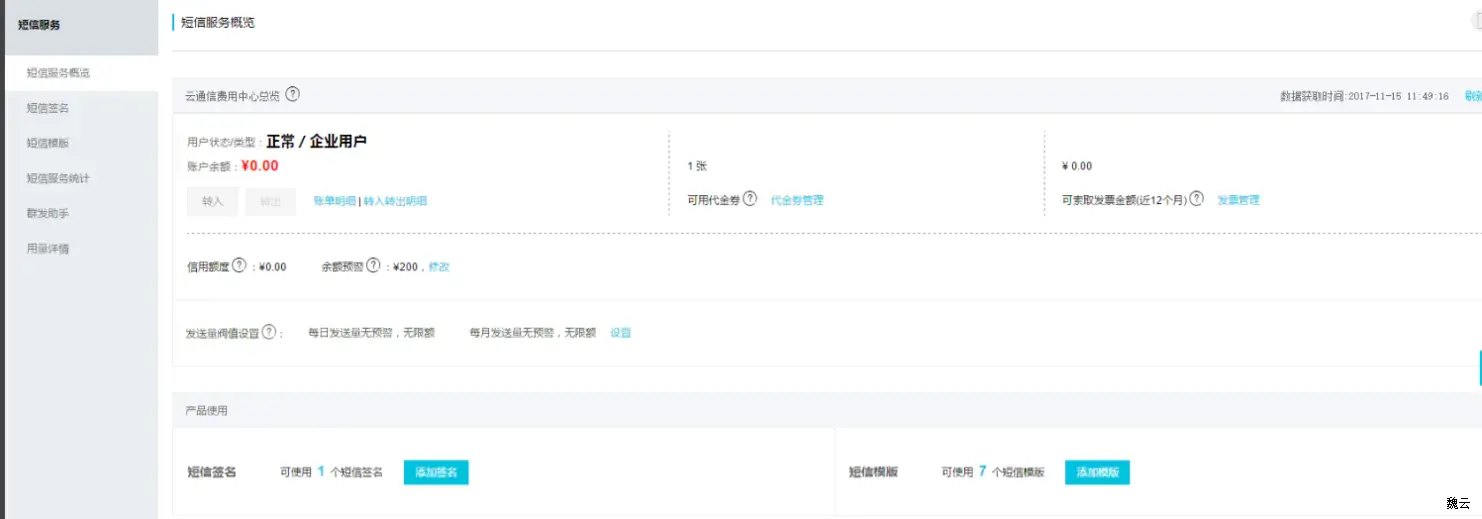
2.2 进入控制台: 点击查看控制台

进行购买短信包
这里我们用python 为例, copy下来, 放到, demo中, 进行模块封装,方便进行调用,
1
2
3
4
5
6
7
8
9
10
11
12
13
14
15
16
17
18
19
20
21
22
23
24
25
26
27
28
29
30
31
32
33
34
35
36
37
38
39
40
41
42
43
44
# 推荐使用 pip 命令,安装阿里云SDK核心库:
pip install aliyun-python-sdk-core
#!/usr/bin/env python
#coding=utf-8
from aliyunsdkcore.client import AcsClient
from aliyunsdkcore.request import CommonRequest
def send_aliyun_msg()
"""
:param phone_num: 手机号
:param content: 短信码
:return:
"""
client = AcsClient('<accessKeyId>', '<accessSecret>', 'cn-hangzhou')
request = CommonRequest(pthone_num, content)
request.set_accept_format('json')
request.set_domain('dysmsapi.aliyuncs.com')
request.set_method('POST')
request.set_protocol_type('https') # https | http
request.set_version('2017-05-25')
request.set_action_name('SendSms')
request.add_query_param('RegionId', "cn-hangzhou")
request.add_query_param ('PhoneNumbers', "%s" %phone_num)
request.add_query_param ('SignName', "jk4716138")
request.add_query_param ('TemplateCode', "SMS_167532197")
request.add_query_param ('TemplateParam', "{\"code\":\"%s\"}" %content)
response = client.do_action(request)
# python2: print(response)
print(str(response, encoding = 'utf-8'))
if __name__ == "__main__":
send_aliyun_msg()
在注册视图中, 我们进行调用,即可,
短信发送,属于,防止机器人非法注册,(短信一条 大约0.045元,自行测试即可)
图片验证码
七牛云做图床,Python上传图片
首先需要install 模块
pip3 install qiniu1
2
3
4
5
6
7
8
9
10
11
12
13
14
15
16
17
18
19
20
21
22
23
24
25
26
27
28
29
30
31
32
33
34
35
36
37
38
39
40
41
42
43
44
45
46
47
48
49
50
51
52
53
54
55
56
57
58
59
60
61
62
63
64
65
66
67
68
69
70
71
72
73
74
75
76
77
78
79
80
81
82
83
84
85
86
87
88
2. ```python
# -*- coding: utf-8 -*-
# flake8: noqa
from qiniu import Auth, put_file, etag, urlsafe_base64_encode
import qiniu.config
import sys
import os
import time
import subprocess
#-----------默认配置-----------
# accessKey和secretkey是七牛的秘钥
access_key = '七牛账号下查找'
secret_key = '七牛账号下查找'
# 存储空间
bucket_name = 'noteimages'
# 域名
bucket_url = '存储空间的外链域名'
# 格式
img_suffix = ["jpg", "jpeg", "png", "bmp", "gif"]
# 本地存放图片地址
oldPath = '/Users/zwz/Desktop/md文件/mdImage'
# 修改名字后存放在的新地址
newPath = '/Users/zwz/Desktop/md文件/mdNewImage'
# 生成结果文档
result_file = '/Users/zwz/Desktop/result_file.txt'
# 存放链接数组
dataArr = []
def rename(name):
count = 0
fileList = os.listdir(oldPath)# 该文件夹下所有的文件(包括文件夹)
for files in fileList: #遍历所有的文件
oldDir = os.path.join(oldPath, files) #原来的文件路径
if os.path.isdir(oldDir): #如果是文件夹就跳过
continue
fileName = os.path.splitext(files)[0] #文件名
fileType = os.path.splitext(files)[1] #文件扩展名
if fileType == '.jpg' or fileType == '':
fileType = '.png'
timeString = time.strftime("$%Y-%m-%d$", time.localtime())
#生成新的文件名字
dataName = name + timeString + str(count) + fileType
newDir = os.path.join(newPath, dataName) # 新的文件路径
os.rename(oldDir, newDir)
count += 1
#链接添加到数组
dataArr.append(upload_data(dataName,newDir))
#上传文件到七牛, 返回链接地址
def upload_data(newName, localfilePath):
q = Auth(access_key, secret_key)
# 上传到七牛后保存的文件名
key = newName;
# 生成上传 Token,可以指定过期时间等
token = q.upload_token(bucket_name, key, 3600)
# 要上传文件的本地路径
localfile = localfilePath
ret, info = put_file(token, key, localfile)
return bucket_url + key
def crateFile(dataList):
with open(result_file, 'w+') as f:
for data in dataList:
# 如果是图片则生成图片的markdown格式引用
if os.path.splitext(data)[1][1:] in img_suffix:
f.write(''+'\n')
f.close()
if __name__ == '__main__':
#生成链接
rename(input('请输入md文章标题: '))
#写入文件
crateFile(dataArr)
#打开文件
os.system('open '+ result_file)